Showing posts with label Christmas. Show all posts

Monday, December 11, 2017

Mexican Nicho Ornament

When I first saw Gwen Lafleur's website, one of the things I fell in love with were the Mexican Nichos. They were all so gorgeous I had trouble choosing just one, but I decided to try starting off with a small one. I loved it, but just couldn't decide quite what to do with it. The pretty nicho sat on my worktable staring back at me. A couple of days ago, it suddenly it occurred to me that it would make a wonderful Christmas ornament...and I knew just whose photo to put inside--our little Maltese fur baby, Coco.
First, I gathered some items I thought might work with the nicho and a few tools: a spool of wire, jewelry wire cutters, scissors, beads, and ribbons. While rummaging through my jewelry components stash, I found a carved red heart that I had been holding on to for years. I had added a decorative headpin and twisted a loop in the top, but it didn't work for any of the necklaces I was making.  However, it seemed just the perfect item to combine with the nicho. Red for Christmas, and a heart for love.
I got started by cutting a length of wire, which I twisted into a loop on the back of the nicho, making the loop big enough to hang off a branch. I left the ends very long so that I could attach the carved heart at the bottom.
The heart didn't hang quite the way I wanted so I tried stabilizing it on the back with a few pieces of washi tape. I also wrapped some washi on either side of the base of the wire loop to keep it from slipping.
I still wasn't happy with the way the heart was hanging, so I decided to clip the long wires off and rethink the hanging method. I decided, with another long piece of wire, to try adding some more beads, then wired on a bow and a few more little red beads. I attached it to the top D-shaped loop (which is part of the nicho) and again I stabilized it with washi tape.
The ornament seemed almost finished, but I needed to make a couple tweaks. I switched out the blurry laser-printed photo of my beloved dog Coco for one printed on glossy photo paper from an ink-jet printer at a slower speed. I considered using a color photo, but the black and white worked nicely with the silvery-colored nicho. 
I used a small piece of waxed paper, cut exactly to the size of the nicho, to determine just where to trim the good photo. It was hard to choose which of the pictures to use--they were all so cute. I loved the one of Coco with a giant cup of coffee at a sidewalk cafe, but settled on one of at home him "reading" the New York Times fashion section, with his paw on a Gucci ad.
The nicho opens up and has a space about 1/4" deep. I decided to fill the space so the photo would be right behind the glass. So, I took some wedge cosmetic sponges, trimmed them down a little, and glued them into the case. I also stumbled on some little red faux-berries, and tucked them into the nicho closure for a holiday accent.
I trimmed the ribbon ends, and at the last minute, decided to also add a bit of ribbon to the top loop, where the ornament would meet the tree branch. The ornament is especially poignant for our family--little Coco died last year, the day after Christmas. He was 12 1/2 years old, and had been sick since Thanksgiving. This will be the first Christmas in 13 years without him, but with this special ornament, he will still be with us.

A nicho ornament doesn't have to just be for Christmas: it can honor anyone at any time. 

Envision how adorable it would be with a photo of a new baby, embellished with pastel ribbons, beads or a tiny rattle. It could also be a tribute to an ancestor when done with a sepia-toned photo and earth-tone ribbons and beads. Take a look at the many sizes and shapes of nichos that are offered on Gwen's website...I hope you'll love them as much as I do!


.


Sunday, December 8, 2013

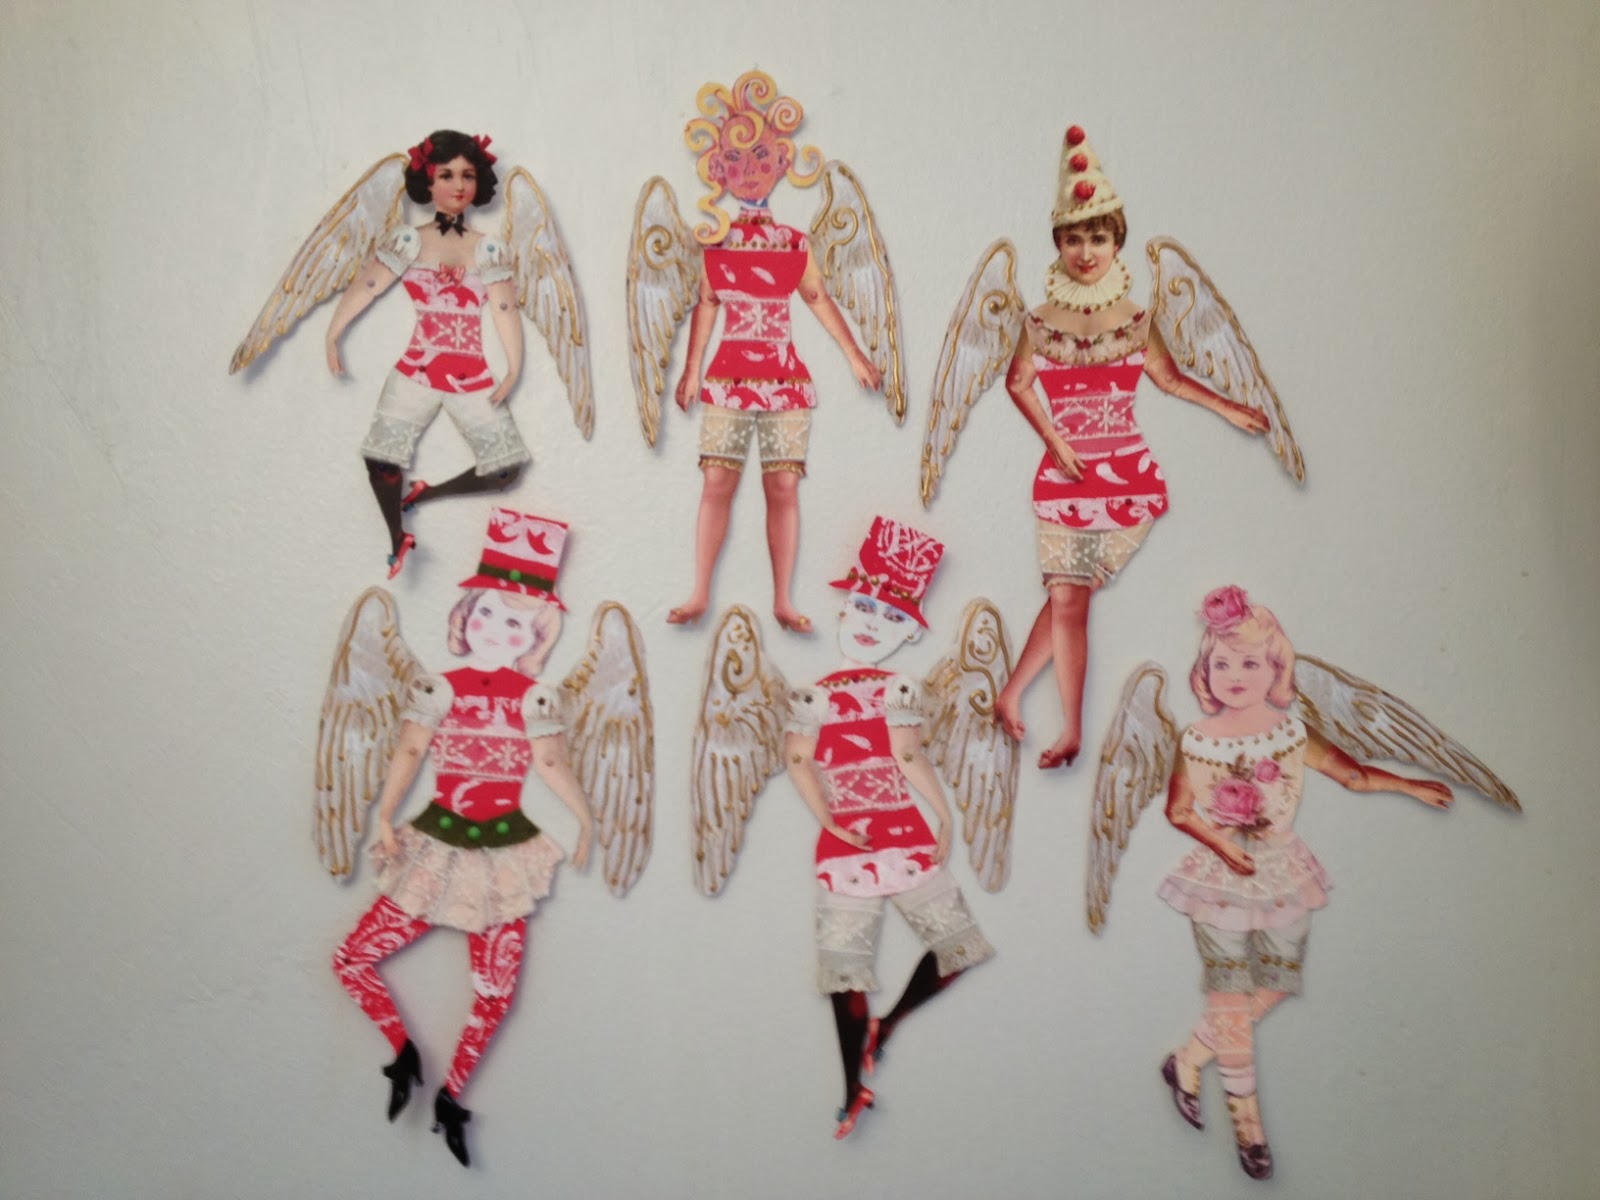
Funky Flat Angel Dolls

The heARTist trading group side trade for December was flat angels or flat Santas. I started researching both angels and Santas. I found cute, I found pretty, I found sentimental, I found bizarre and creepy. But I didn't find an idea that spoke to me. So, I started puttering with my shoeboxes full of doll parts and scraps, which usually leads me to something interesting and therapeutic.

There were some leftover scraps of white on red printmaking that I used for my house-shaped ATCs, so the scraps became bodies. I used an assortment of vintage and original doll heads and body parts. The main thing that makes an angel is a set of wings, so each has some gigantic wings with gold dimensional paint accent. All the parts are attached with mini-brads to make them poseable. I added a finishing touch of some sheer lace that resembled snowflakes, extra dabs of gold paint here and there, and ended up with an assortment of very funky angels.

I decided to keep one angel. It was hard to choose a favorite, but settled on one that used a vintage Pierrot Clown Lady paperdoll image from the Graphics Fairy. http://thegraphicsfairy.com/

 Thank you Karen Watson for your wonderful site of free vintage images!


Christmas House ATCs

The Roses On My Table online group had a theme of "House Shaped Christmas ATCs" for their December trade. I must confess, I am a bit of a Grinch about Christmas so I didn't want to get all sentimental. Why am I a Grinch? Well, I hate the commercialization, the TV commercials that air right after Halloween, urging you to buy, buy, buy. I don't need any presents. My family doesn't need any presents. There are so many homeless people, so many world disasters, that is seems crazy to buy into the materialistic Christmas agenda. Still, I wanted to try the theme because the house shape was so darn cute.

I bumbled on a test print I did of an Indian wood block I recently purchased in the East Village. The block has stripes on the top and bottom and a paisley/floral shape in the center. I had a lot of red cardstock left from a project, and had done the print on red with my favorite white printmaking paint.

I decided to start with the print and cut it into little house shapes, 2.5" x 3.5". I added a simple door, made of cut paper that came in a pad of ugly scrapbooking paper that I received a gift. The ATC was beginning to shape up, but it needed more, so I pulled out my very favorite lace, purchased at M&J Trim, that gave the feeling of snowflakes. The finishing touch was a star shaped mini-brad as a doorknob.