Dolls are dear to the hearts of many people. As much as I love three-dimensional dolls, I have always loved paper dolls even more. I have fond memories of receiving new paper dolls on special occasions, and of seeing the Betsy McCall paper dolls in the McCalls magazines at my grandmother's house. So, it's no surprise that as an adult, I am especially enchanted with making arty paper dolls. One of my friends recently started an online art paper doll trading group, so I got to work right away.
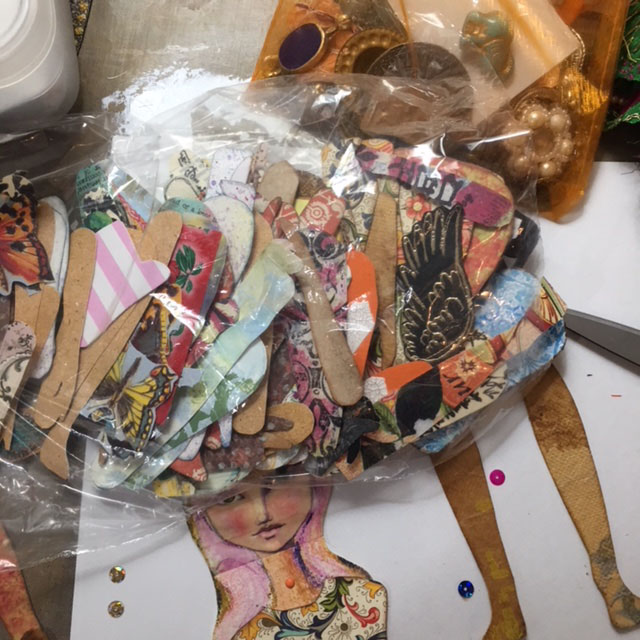
The first theme is "artists choice," so I started rummaging through my scrap papers looking at them with a new eye to see how each scrap would translate into an arm, leg or torso. I also spent some time rifling through fashion magazines for interesting heads, printing and painting my own heads with stencils, stamps, and watercolors. My dolls usually cry out for wings and crowns, funky shoes and skirts too.
 |
| My work table with assorted doll parts and heads to choose from. |
 |
| Left: Paper Doll body from Retro Cafe Arts; Right: head stamp from Lynne Perrella plus assorted body pieces. |
For most of the body parts, I used a template from Retro Cafe Arts. Reprints of vintage paper doll parts are also fun to use, and available on the internet from many sources, such as The Graphics Fairy.
 |
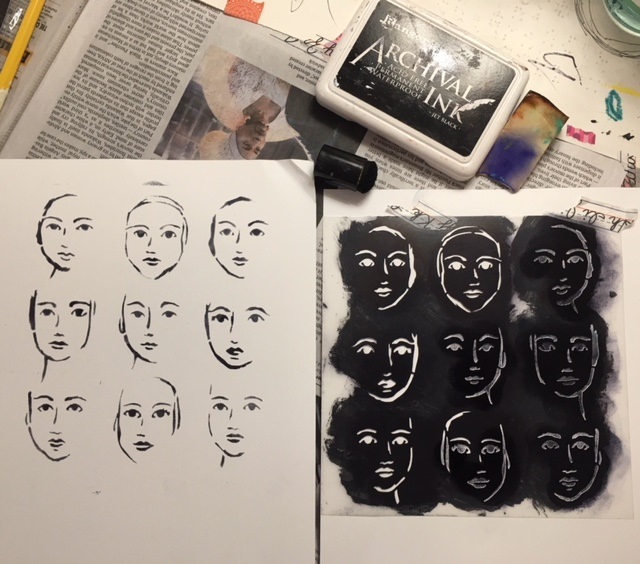
| A face stencil from StencilGirl was used for some of the doll heads. |
A stencil from Stencil Girl had nine heads that were just the right size for my template. I dabbed black ink through the stencil, and also flipped the stencil and made nine more.
 |
| Color was added with Derwent Inktense Blocks. |
 |
| I added hair, ears, and more color to the stenciled faces. |
I added my own lines for the hair and ears. With Derwent Inktense Blocks and water-soluble colored pencils, I added details. After they dried, I carefully cut out the ones I liked best.
 |
| Some of the faces were very close together on the stencil, leaving little room for hair so those faces needed hats and crowns. |
For wings, I used a large butterfly stamp that was purchased at Ink Pad NYC. A magical effect was achieved using the stamp with Seth Apter's
Baked Texture embossing powder. I used a variety of embossing powder and background colors for the wings. For more subtle dolls, I used a mini wing set and small crown stamp designed by Birgit Koopsen. German Dresden Trim Gold
Bourbon Crowns from Gwen Lafluer's website topped several heads--some distressed, some left shiny.
 |
| This was a test page leftover from creating grunge-effect backgrounds painted on a recycled manila file folder. I used the left side to make butterfly wings and the right side for body parts. |
Once I got started, my worktable looked like a doll factory. I had an
assortment of body parts scattered around, and kept mixing and matching
them. I like to use mini brads to assemble the dolls; the brads allow the dolls to be posed, and also makes it easy to tuck the arms and legs up and down so they fold up very small for storage. Unlike three-dimensional dolls, 20, 30 or more paper dolls can easily be arranged to fit inside a shoebox for storage.
 |
A folding tray table was used to try out different combinations of body parts
before mini brads were added to hold the dolls together and make them poseable. |
 |
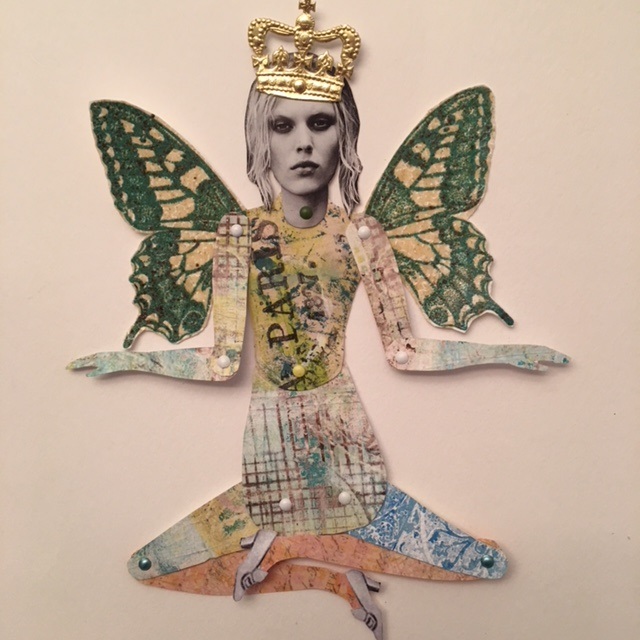
This green-toned doll has a supermodel's magazine photo face, mail art scrap body parts, embossed wings
and a Dresden Trim Bourbon Crown. |
On another, I used a
Dresden Trim gold medallion and distressed it to look like an ancient warrior's helmet. To enhance the warrior/goddess effect, I added
little gold wings on her feet. Later, I gave her a gossamer ice blue skirt, made from a sheer fabric gift bag with the bottom cut off.
 |
| This doll has the feel of a female warrior, with her elaborate Dresden Trim crown, embossed wings and winged boots. |
Washi tape and a
downloadable rose from Gwen's collection were added to enhance some of the body parts. The large and small wings have added bling with embossing powder from
Emerald Creek.
 |
| Two different floral washi tapes were added in a cross design to enhance a body made from commercial scrapbook paper. |
 |
| This doll has a small downloadable rose and several washi tapes on a collaged body. |
 |
| Four of my favorite dolls--I couldn't quite part with any of them. |
It was hard to decide which to keep and which to trade. Once I made a doll that I loved, I didn't want to part with it. Finally I created one that was perfect for my trade partner: a hipster fashionista steampunk-inspired doll. She has a magazine face, big embossed wings, distressed rust body parts made with Seth Apter's chalk paints, and most magical of all--a skirt made from an
embellished Silk Sari scrap--one of the new items on Gwen Lafluer's website.
The word "seek" was made from an Artistcellar pocket stencil used with chalk paints and Baked Texture Patina Oxide, and the clock parts were gifted to me in an art trade.
 |
On a background of chalk paint layered to imitate a rusty surface, I stenciled and embossed the word SEEK,
and also flipped the pocket stencil to get the opposite image. |
 |
| This detail shot shows the embellished sari scrap skirt and clock parts. |
 |
| It was hard to part with this very special doll, but I received something wonderful in exchange. |
In the first trade, in exchange for my "seek" doll, I received a fabulous creation from artist
Ann Sullivan Barnes.
She used components from Character Construction to make this fabulous
doll, which she named Liberty. Liberty also came with a beautiful red,
white and blue carrying case.
 |
| "Liberty" by Ann Sullivan Barnes |
 |
| "Liberty" detail shot |
These type of paper dolls can also be a great shared project with
children, and, depending on how they are decorated, make great additions
to seasonal displays. Imagine Halloween paper dolls in scary witch
costumes riding a broom or lucky leprechauns with a pot of gold!
Here are some of my favorite creative dolls I have received in trades over the years. I hope they inspire you to give paper doll making a try.
 |
| Teapot/geisha doll by Leah (last name unknown) |
 |
| Mythical, magical midnight ball "Bartholomew Badger," by Joann Robinson |
 |
| Turn of the century Zetti bather "Liam," by Joann Robinson |
 |
| Turn of the century Zetti bather by Jeanne Draachreider |
 |
| Tea party/geisha "Mi'" by Joann Robinson |
 |
| Marie Antoinette theme: Madame DuBouffant, by Deb Benedict |
 |
| Steampunk Doll by Kay Milam |
 |
| Mizz Prissy BuZahrd by Jeanne Draachreider |
 |
| Mermaids and Mermen theme; Stan the Toucan Man by Marilou Bain |
Congratulations
to Gwen Lafluer! Her online shop has just turned one year old. To
celebrate, she is offering a really great discount--15% off Mixed Media
supplies and downloads. She has a really unique and inspiring collection...I really want everything on her site! Happy shopping!