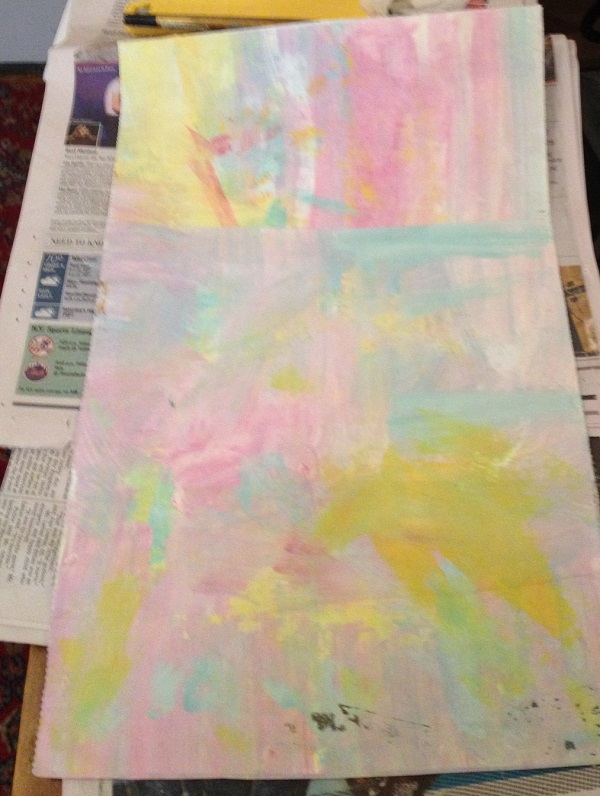
Showing posts with label painted deli paper. Show all posts

Saturday, June 3, 2017

Altered 1969 Diary


Finished front of altered diary, covered with painted deli paper

Finished back of altered diary
A few weeks ago, I met up with some old friends in the Catskills. One of the women, who is dealing with an aging, ill mother, had been cleaning out the family home, and brought along some old diaries from her teenage years. She had a vision of burning them in the stone fireplace, but before destroying them, we took a look through. Surprisingly, there were very few written memories of wild escapades...it was more about what she had for dinner and how hard the math test was and what she was going to wear to the school dance and what favorite 1960s song was playing on the pop AM radio station at that moment in time.


As she was about to toss them in the fire, the "art light bulb" went off in my head--they would make great little altered books! I had been meaning to try making one, and had read about the process, so I rescued them from a flaming end.

Diary with painted and handwritten deli paper covering front and back
(unfinished)
Rather than starting with the pretty red one that most caught my eye, I decided to use the ugliest one since it would matter less if I made mistakes on the ugly one. I tore out every other page, plus a few more, then used matte medium, spread on with a credit card, to stick two pages together. The ink ran and smeared, which was a surprise since the ballpoint pen had been on the market quite a few years. I later discovered that she preferred an old-fashioned ink pen. The runny ink created quite a nice indigo mushy effect, so I embraced that happy accident.

I also decided to try covering the diary with painted deli paper. While in the Catskills, I did several paintings and journal pages, and had used up excess paint by randomly wiping it on deli paper that I also written on about our weekend adventures. I covered the brass locks with washi tape for protection from the paint, gesso and glue.

After the inner glued pages had dried, I painted some with gesso, and added leftover scraps of paper, printed teabags, plain teabags and a little washi tape here and there.

I had an old photo of the diary owner and another mutual friend that was taken in a Woolworth photo booth in the early '70s. It seemed appropriate to use that on the first page of the inside.

A whimsical photo of two silly teens, taken in a Woolworth photo booth series
is on the right page of the altered diary, after the inside front cover
The diary is still a work in progress, and it may take years to finish all four of them. I am looking forward to seeing how this ongoing project develops in the months to come.

Second set of pages of the altered diary
Inside back cover (left) and last page of diary, with dried teabag over runny ink


Saturday, November 12, 2016

Up-Cycling Leftover and Imperfect Artwork

I used to open the refrigerator and look around for something to eat for dinner and close it saying: "Nothing good in there to eat." But my roommate Susan had a knack for cooking, and would rummage around and turn the leftovers into something delicious. Our deal was that Susan cooked and I did the dishes...we both thought it was a good deal.

In the past few days, I decided to apply Susan's creative cooking technique to my art stash and UFOs. First, inspired by a class I took with Julie Balzer, I made a new Junque Journal. I alternated pages of painted deli paper (doubled together with matte medium for strength) with really pretty commercial 12"x12" scrapbooking paper. I decided to try machine binding the pages because I had a shoulder injury and hand stitched binding would have been painful.

Here is the cover I chose: painted deli paper with 6" Artistcellar chakra stencils. (Artistcellar also makes small chakra pocket stencils) The spine was created with some old hippie style trim I purchased years ago on sale. Not a perfect match, but not too bad, and since it is a Junque Journal, it didn't matter.

"Junque Journal" with cover made from painted delipapr and Artistcellar Chakra stencils
The first page I worked on has a beautiful fashion figure that was an illustration in a recent FIT Alumni News magazine. It reminded me of why I came to New York, how much I wanted to be a fashion designer when I was young--but afraid to try, afraid I wasn't any good. I eventually ended up going into the fashion business and found my niche as a fabric designer. It was an uphill battle against parents and teachers who had other ideas of what I should do with my life. I wrote my memories on the page with white and purple ink.

An illustration from FIT's alumni magazine sparked some memories, which are written on the journal page.
A few days later, I decided to use up small ATCs and scraps that were too pretty to throw out, but not quite pretty enough to trade with my Paper Traders yahoo group. Adhering them to some Retro Cafe Art mini gothic arches gave them a new look. I made a duo and a triptych, and hinged them with 1" pieces of elastic and mini brads.

Leftover, imperfect ATCs were used to create this butterfly themed gothic arch mini triptych.


Leftover and imperfect ATCs were the base of this mini gothic arch duo.

On Election Day, I decided to use up some splattered watercolor paper that was hanging around. I cut the pages in half, then folded them, stitched them, and viola...I had a new mini journal. It needed a little something on the cover, so I grabbed my favorite Artistcellar pocket stencils, some Michelle Ward NYC urban-themed stencils, some ink, a cosmetic sponge wedge, and just played. Little did I know that the words I stenciled would have even deeper meaning as the election results began to come in.

This mini journal has 4.5" x 6" pages, with a simple stitched binding.


Monday, September 26, 2016

Arty Envelopes: Making Ordinary Items Beautiful

Mail Art. I love receiving beautiful, hand painted envelopes, especially when they have international postmarks and stamps. For a new Paper Traders exchange, we will be trading decorative envelopes.
Front of a finished envelope
Using a favorite size envelope as a template, I traced the shape on several pieces (double thick) of painted deli paper. They looked pretty good just with splashes of color, but I went another step and added stencils. 


I also was required to add a mailing label, which changed the whole look. To offset the big chunk of white in the middle, I added strips of other designs, washi tape and stamping.

.
Mail Art envelope: painted deli paper, stamps, stencils, paper strips, newsprint.


For other envelopes, I used some ho-hum leftover artwork, traced on the template, and cut to size. Once it was cut and folded, a sort of boring design became a very striking envelope. I especially liked the NYC stencil, from Michelle Ward's exclusive collection at The Ink Pad NYC.

Stenciling experiment
Artwork cut to envelope template shape
Back of finished envelope

Saturday, September 10, 2016

Just Paint

Back in college, there was a professor who taught a course called "The Teaching of Reading." Many years later, his favorite line still rings in my head: "It doesn't matter WHAT you read, it matters THAT you read." His idea was to instill a love of reading in kids and not judge them if they read comic books instead of literature.

A small abstract with layers of paint, painted deli paper, gesso and matte medium.


That is a pretty good idea to live by. An artist--or a writer or designer or any creative person--is constantly bogged down by the inner critic, who judges the work and squashes creativity. I recently took a day-long workshop with Dina Wakley; it was great fun and very productive. Dina is really funny and inspiring, urging us not to waste paint (wiping it on her apron instead of throwing it away). Dina has her inner critic's mouth taped shut. She would look a a work in progress and squeal "oooh, I loooove it!" One of her mantras is "done is better than good."

StayCation series of abstract art experiments using Dina Wakley's painting method.
On my recent summer PaintStayCation, I pulled out my paints, board, paper and tools and just created without too much thought. Lots of experiments, a few successes, and a few failures. A voice from another workshop rang in my ear...Julie Fei-Fan Balzer saying: "knock it back." Unlike working in watercolor, where it is hard to do things over and make corrections, with acrylic you can just gesso over areas that you don't like. Sometimes you get a shadow or hint of the underlayer, sometimes it is completely covered up. I kept layering and repainting until I kind of liked what was there.

Another goal with my art--in addition to shushing the inner critic--is not worrying about what anyone else thinks. Painting in public has always made me uneasy, thinking I am on display and need to be brilliant. On a long Amtrak trip, I pulled out my journal, watercolor pencils, watercolor set and a little koi paintbrush. The brush has a well that you can fill with water and squeeze, which makes a water jar unnecessary, and is idea for travel. I put in my earbuds, cranked up the music and painted away, ignoring my seatmate and other passengers. Here's the journal page that I made:

Abstract swirls and thoughts on a journal spread done while traveling.
Back in highschoool, I knew I loved art but didn't know who I was as an artist. I was experimenting with drawing fashion figures, painting and sketching interesting old homes, and trying to find the right box to fit in. My art teacher looked as some things in my sketchbook and pointed me to some freeflowing, swirly designs and said: "this is what is really special, unique to you." My doodle, my swirls, my musings and random thoughts are now part of my "toolkit" and what I incorporate into a lot of my work.

The journal pages were started on a recent Amtrak trip, and finished at home, with several layers of writing, paint, gesso, watercolor and markers.
It is still hard to squash that inner critic, easy to compare myself to other people, well-known people. Easy to feel discouraged. I remind myself often that art is more about the process than the product. I think of my long-ago professor's words and say my art mantra to myself: "It doesn't matter WHAT you paint, it matters THAT you paint."


Monday, April 4, 2016

Printmaking and Painting and My Art Staycation

Today officially starts my week-long  ART STAYCATION! Unofficially, it started Saturday morning. I pulled out most of my art supplies and scattered them around the living room in organized chaos. Saturdays seem to be the day when I just create a mess, painting backgrounds that don't look like much, pulling prints off my new gelli plate, cutting, measuring, mixing and splattering. On Sundays, I am more rested and often manage to figure out a way to pull the unrelated art bits into some kind of unified piece. Sometimes it is just a little edge of a print that becomes an ATC or a tag.

Collage with Gelli printed deli paper and stencils, assorted papers,
vintage royalty free images and printout of original drawing

Collage using vintage magazine ad, stenciled
Gelli printed deli paper and assorted papers


For my staycation, I have a few plans. One is to work on my faces using the Jane Davenport method. I have a vision of doing something bigger than an ATC, incorporating angels and wings and Medieval illuminated writing on it. I have sketchbooks and journals full of ideas that I scribbled down in moments of inspiration, so I will pull them out and see if anything turns into a solid idea.

Layers of Gelli-stencil deli paper prints, thermofax prints and assorted papers
I hope to pull my 6x6 series from the Julie Balzer workshop into one piece, maybe even hang it on the wall. Strangely, our walls are kind of empty, and my husband keeps saying: "Why don't you hang some of your work up?" Why indeed? Well, much of it is in art journals--can't hang them very easily. Some pieces are too personal, too in-your-face and I don't want to look at them every day. Some of them remind me of where I have been, emotionally, and looking at them evokes feelings I don't really want to revisit.

There's a couple unfinished projects on the horizon: my finishing the hand-quilting on my grand-niece's handmade fabric piece, repairing broken jewelry--some commercial and some handmade. Then there's the canvases...I made a "junque journal" in a Julie Balzer class, which is now so fat it will hardly close. So, I need a new one. I had some painted canvases that were intended to be covers for the first journal, but they weren't quite right. So, yesterday I gessoed over them. I had used some fiber paste through a stencil, and the gesso didn't cover it, so I used molding paste on top. Still didn't cover it. So that's a back-burner project in two parts...making the canvases look okay, and putting them together into a new journal.

Here's the 2"x3" printmaking experiments from yesterday. Two will be traded, one is a "keeper" and the rest will go in the nowhere land storage bin and either be reworked, added to another project, or used for an emergency greeting card.


Saturday, March 26, 2016

She Always Knew She Could Fly Doll and Scribe-Muse Journal Page

She Always Knew She Could Fly
This little paper doll's body was made with a Retro Café Art template and commercial scrapbook paper. I had already used the doll for my Empowerment Paper Doll a while back, but I cleverly saved the paper it was punched out from, and used it as a template, carefully tracing the shapes onto some pretty pink scrapbooking paper.

The skirt is a little piece of a paper towel that had been used to wipe up the overflow from some spray dyes. A section of paper towel, about five or six inches long by three inches tall, was gathered at the top, then tied to the back. It is secured with a paper flower cut with a punch and a floral mini-brad center. The wings were stamped on white paper. The shoes and crown are Graphics Fairy royalty free images, printed on cardstock, and the face is mine--from my kindergarten photo. The background is painted deli paper.

It reminded me of the innocence of childhood, before there was anyone telling you what you could and couldn't do, believing anything is possible, exploring the world. The crown represents the feeling of magic, of believing you have special talents, and the wings represent the freedom to fly and soar and be your best self.
I was the scribe, I was the muse journal page exploring past lives
In a similar vein, I have been thinking of past lives, what I would have been, and who I would have been there with. Of course there is no way to prove my theory, but I have always felt a connection to Illuminated Manuscripts and wondered if I were one of the monks or scribes that helped create some of the beautifully illustrated pages. This journal page is the beginning of my exploration of that thought. The doll parts, face and butterfly wings are from the Graphics Fairy. The crown/halo didn't work out the way I intended. It is a piece of a pink Gelli Print on deli paper, done with a lacy stencil. Journals are the place to allow yourself to be imperfect. The page is not exactly what I visualized, but I hope to do a series of paintings in this theme on my upcoming art "stay-cation."

Saturday, February 27, 2016

Fear of Blank Pages and My New Journal

Breaking in a new journal is hard...all those blank pages staring back at you, daring you to do something, and your inner critic saying "don't mess it up! Be brilliant! No smears, nothing sloppy, nothing trite!"

To overcome the dreaded blank journal page, I made my previous journal with colored cardstock, which helped a little. For my latest journal, I went a step further, using some delicious commercial scrapbooking paper and some painted deli paper instead of blank pages.


Randomly painted colorful deli paper was used for the journal pages.
Two thin sheets of painted deli paper were put back to back and glued
together with matte medium to form each page.

Commercial printed paper and painted deli paper covered the
folder cardboard, and signatures of colorful paper were sewn in
to each fold.

For the journal cover, heavy cardboard was covered with my
own fabric, which I designed and was printed on cotton by Spoonflower.
 
Pieces of commercial scrapbook paper was cut to size for
some of the journal pages.

The unfinished journal, with both commercial paper and
painted deli paper.The tied signature pages are visible.
Once the journal was done, I still stared at the pages and thought "oh, this is too pretty to mess up!" But I pressed ahead and worked on the page anyway.

First completed  page of the new journal

I used a beautiful photo of a poppy--one of my favorite flowers--that was torn from a Spring fashion catalogue. It went nicely with the pink painted deli paper background. In my stash, I found a little bottle of Lumiere acrylic paint, so I used it with some stencils to add texture.

Then I added words that popped into my head. I am always thinking about art--designing some new project in my head, or doodling, or scribbling down ideas or taking a photo of something that inspires me, so I wrote those thoughts.

Some of the pink painted deli paper shows through, which is much more interesting than the standard white page.

After the first journal page was done, I was on a roll, so I also finished part of a shared "hands" project. Originally we were going to start painting or drawing on a hand shape, then mail it around and each person would add a little bit...kind of like a chain letter. However, one of the participants decided to make a book, so I took her blank hand shape, and used it like a little journal page, applying stamps, stencils and words randomly to the front and back.

Palm of hand, with Julie Fei-Fan Balzer stamp and
Artistcellar stencils

Front of hand, with stamps, stencils, paint and markers.

Tuesday, June 30, 2015

Beauty's Only Skin Deep


For years I have made art paper dolls, so after I made an collaged journal background, I decided to see how my doll parts would work in collage. I chose a few interesting, unrelated leftover body parts (mostly printouts of royalty-free vintage graphics from The Graphics Fairy) and, using a glue-stick, stuck them to the page without over thinking it. I ended up with two unrelated pages side by side. the background has charred baking parchment, printed tea bags, painted deli paper and other assorted papers.


The left side has a face that I just didn't know what to do with. It started with a small square stamp of a face, but the face had a black border around it which made it awkward to use. I enlarged it added color, a neck and hair and turned it into something that looked like Chrissie Hynde on a really bad day. It sat in my doll part box for years looking kind of sad.

The pear is a not very subtle reference to the pear shaped body type, and the little face at the bottom of the pear is a salute to pregnancy and motherhood. I liked being able to have the boot unattached to the body--it suggests a young woman who is rushing and barely has time to get dressed, maybe juggling motherhood and family and a career.


The right side is a face from a New York Times Magazine fashion spread and body parts from a vintage paper doll. I didn't intend to do a two page journal spread, but I had so much fun with the left side I decided to keep going and do two doll pages.

As I looked at it and decided what to do next, words came into my head: "beauty's only skin deep." Using mini alphabet stamps and a permanent black ink pad, I wrote out those words on the left, and on the right, the "model" joins in to the musical refrain of the Temptations hit song with "yeah yeah yeah."

Tuesday, June 16, 2015

Making a New Journal With Deli Paper and Scraps


 This is the cover of the new accordion journal that I just finished making. The cover is made from recycled cardboard and painted deli paper. The Kurt Vonnegut quote on the bottom expresses the reason I feel compelled to do mixed media work in my journal...it lets the crazy energy out that might otherwise be trapped inside me and make me anxious, panicky and physically sick.


Last summer's class with Kelly Kilmer at the Ink Pad got me addicted to journaling and to making my own journals. I have beautiful journals that I have purchased or received as gifts that are too precious to use. I am always afraid of messing them up, and I also have my inner critic telling me that only fabulous work is worthy of the pages.

With a journal made from leftover cardboard and junk art that is too good to throw away but not good enough to hang on the wall, the voice of the inner critic is silenced. It also becomes very personal and really belongs to you.

Following the directions that Kelly gave to class participants, I made my third accordion journal recently. I love every aspect of the journal making...I love sewing, so that skill comes into play with sewing the signatures together. I love construction and cutting, so measuring and cutting the cardboard (from the backs of used-up legal pads) is right up my alley.

I rummaged through my pieces of painted deli paper for the cover, and used reject paintings for the accordion sections. The signatures were made with assorted colored cardstock I had on hand. I ran out of waxed linen to stitch it with, and couldn't find my big blunt needle with a huge eye, so I doubled dental floss and used an embroidery needle.

Here's how it came together:

I used two similar pieces of painted deli paper
and connected them using matte medium
I glued the cut cardboard pieces to the deli paper with
matte medium, then wrapped them around the edges.

I made signatures of folded cardstock (in a variety of colors) then stitched them to
a long, accordion-folded piece of hot pink paper, recycled from a poster


Here is the book opened and folded after the pieces were stitched

I didn't like the hot pink, so I covered it with reject mixed media paintings and
painted deli paper with printmaking experiments.

interior view of book

Another interior view of a deli paper covered accordion section

This is the old cover. The striped part is the back.
(silly me, I had it upside down when I took the photo!)
The front sectionwas lumpy and bumpy because I did not use enough matte medium
when I covered the cardboard with the painted deli paper. I tried and failed
twice to fix it, without success, so I just added a smaller piece of
another painted deli paper for the final cover.


This is the final journal, front and back, with the new cover. I can't wait to use it!