Monday, April 26, 2021

My Favorite Things: A Stamped Hamsa Tag With Handmade Beads

I don't know what took me so long to order Gwen Lafluer's "India" PaperArtsy stamp set...maybe its just that she has so many beautiful stamp sets to choose from! The set has features completely hand-drawn designs based on Gwen's travels and the motifs and textiles of India. I was especially drawn to the hamsa, an open right hand, an image used as a sign of protection and good fortune.

I used the large size manila shipping tag from Gwen's online shop, and cut a piece of coffee dyed watercolor paper to fit, then and added white acrylic through a stencil from my new collection.

The partially embossed hamsa stamp, before heating, on top of my "dobbie" design from the ATC mixup stencil.

Naturally the first stamp I used was the hamsa. If you're in New York, the Ink Pad NYC carries the India stamp set as well as lots of Gwen's stamps and stencils. 

I stamped the tag with VersaMark embossing ink, then sprinkled Seth Apter's Patina Oxide Baked Texture embossing powder, then zapped it with a heatgun. Magic!

Stamps were added one at a time to the stenciled base, building the design until the entire tag was covered.

I continued adding other stamps from the set. To fill in a couple empty spaces, when I was almost done, I added dots with an embossing pen, and a little diamond from the Tribal Faces stamp set.

For extra warmth and depth, I swiped the tag with an ink called "pumpkin pie," a delicious caramel color.

After auditioning lots of beads and trim to embellish the tag, I settled on some thick Dresden gold for the bottom, a cinnamon-colored sari silk for the top, my own handmade beads, and a faux coin from a Turkmen parts packet. I "grunged-up" both the Dresden gold trim and the faux coin by dabbing on sepia ink, aqua paint, and rust-colored paint until they looked worn and old.

This piece reminds me of the song from The Sound of Music, My Favorite Things. I used my favorite watercolor paper, favorite coffee dye, my own stencil design, my new favorite India-inspired stamps, my favorite Seth Apter embossing powder, my favorite Dresden gold trim, sari silk in an earth cinnamon color, and several of my handmade beads.

Here's a few closeups so you can see the delicious textures and colors.


Wednesday, April 21, 2021

New Stencils: ATCs, Leaves, and a Sweet Floral!

I am super excited to unveil my three new stencils from StencilGirl® Products! Three stencils may not sound like a lot, but there's a whole lot of design packed into a few little sheets of mylar. Best of all, they work beautifully with my first stencil collection, Lemurian Garden.

Here's a short video that shows how I made the double-sided background design above, which I later used to make the folded business card holder and the upcycled round container in the photo.

If you want a good "bang for your buck" my 9” x 12” ATC Mix Up is really great value. I developed a wonderful variety from my doodles, sketches, silkscreens, and fabric designs. I also adapted a few of my larger Lemurian Garden designs to fit an ATC.

There are nine ATC sized designs, and the 9th (on the bottom right of the stencil) can be further divided into two stencils. The top is a 2.5" x 2.5" turning square design that can be repeated to create a variety of tile patterns, and the small 1" x 2.5" stylized wave at the bottom can be separated from the turning square to make a 10th design.

Click here or here or here or here to see some of the artwork that inspired this collection.

Here's some samples I made from the 9"x12" ATC Mix Up:

The 10 design, from top left to bottom right: dobbie, small Lemurian spiral, millefleur, stylized art, small Lemurian leaf, tiger lily, small pansy, silkscreened tulip, turning square tile, and stylized wave.

Above are some samples made from my new ATC designs. I especially enjoyed flipping and repeating the stylized word ART to create the abstract design on the bottom left. The brown ATC on the top right uses my 10th stencil, the stylized wave.

When I was working on art using my first collection, I realized that I didn't have any small leaves. I kept pulling out a couple old favorite art foamie stamps and adding them to my paintings and journal pages.

Lo and behold, tucked away in a drawer, was a whole file of leaf doodles! So, I pulled out the sketches and developed the new 6" x 6" Lemurian Leaves stencil.


This greeting card was done in fall colors using sepia ink and Patina Oxide embossing powder on a yellow ochre painted piece of watercolor paper.

Another greeting card was made from the Lemurian Leaves using aqua paint sponged onto watercolor paper, leaves printed in indigo ink, and trimmed with ribbon, a paper strip, and a folk art heart.

Last, but certainly not least, is my sweet 4" x 4" Blooming Violet. It was too square to include on the ATC Mix Up, and like the leaves, goes beautifully with not only my first stencil collection, the Lemurian Leaves, and the ATC Mix Up, but stands on its own as well.


The Blooming Violet was used in overlapping pastel colors to create this serene design.


I used a gelliplate to print the Blooming Violet, which allowed the creation of a positive/negative design. I cut the prints into strips and pieced them together to create the artwork seen here. The crackly texture is characteristic of gelliprints.

Here are a few more samples so you can see how versatile the designs are, and how many possibilities they have for your ATCs, greeting cards, journal pages and paintings.

The vase shape was hand-drawn, and stencils from the ATC Mix Up applied using indigo ink and a cosmetic sponge. The tablecloth is the tile design, also from the ATC Mix Up, and the flowers and leaves are from the Lemurian Leaves and the ATC Mix Up.
 
A stenciled piece of deli paper was scanned, then flipped and repeated in Photoshop to create this banner design.


I used the positive/negative prints from a gelliplate to create this "turning square" tile-inspired design. I pieced together the best four prints, scanned them, then repeated the image in Photoshop to create this paper, which I can print from my color printer as needed.
    
I hope you'll enjoy using my new stencils as much as I enjoyed designing them!


Wednesday, April 14, 2021

Stenciled Shrinky Dink Button Cuff

NOTE: This post originally ran on StencilTalk, the StencilGirl blog, 4/13/21)

About a year ago, my arty crew introduced me to Shrinky Dinks. My inner child immediately surfaced, and I did all kinds of experiments with paints and inks and stamps and stencils. I watched them shrink and curl in the oven, holding my breath and hoping that they would flatten out and turn into something usable. For the debut of my Lemurian Garden stencil collection, I made some earrings and a necklace.  But, I got busy with other projects, tucked the shrink film away in my art closet, and forgot about it for a few months.

To announce my stencil debut, this shrinky dink earring was made with my Lemurian Spiral stencil.

The necklace, shown on my page of the StencilGirl website, features the Lemurian Leaf stencil.

For StencilGirl's "wearables" project, I mulled over my many choices: paint some fabric and sew a blouse or skirt or apron; stencil my old clogs in a psychedelic way; or make some stenciled jewelry. I liked the jewelry idea, so I started puttering with the shrink film again.

I had a square of hand needle-felted fabric that I made a couple years ago. After felting, I made a "quilt sandwich" of the felt, thin batting, and a pink and green millefleur. Next, I free motion quilted the three layers of the "sandwich" with a variety of decorative stitches in an earth-toned variegated thread, with shades of dark brown, gray and rust. When I held some of my previous shrunken pieces next to the felt, I liked the colors and textures together, and the cuff idea emerged.

I cut Shrinky Dink circles with a 2.5" round punch and small holes with a standard punch.

The film was painted white before stenciling and baking.
(I discovered, however, that it is better to paint the back white AFTER baking.)


I cut 9 circles, 4 rectangles, and 1 moon shape from a sheet of shrink film.

After painting, the film was stenciled with Archival Ink.

Here are some previous baked creations for comparison with the unbaked film.

I chose a section of each stencil for my buttons and charms.

Here's the stenciled button, ready to be baked.
It is important to punch the button holes BEFORE stenciling.

I stenciled sections of all five of my Lemurian Garden designs onto the shrink film, using both sepia and cobalt Archival Ink. I made circles with my 2.5" round punch, and with the leftover film, cut squares and rectangles.

I made both charms and buttons. For the charms, I used a standard small round punch near the edge, and for the buttons, punched two holes near the center so they could be sewn onto the felt.

I noticed that the stenciled and stamped designs didn't stand out next to the dark felt, so I tried painting the back of the shrink film white before baking. After baking, the white acrylic became gummy and thick, so I decided to paint the backs of the next batch after shrinking.

The stenciled shrink film on parchment paper, ready to bake.

The film curled and buckled in the oven, but eventually flattened out.

I used a spatula to flatten the buttons and charms that were a little buckled.

The section of felted wool was the right length for a cuff, but it was too wide, so I cut it in half. I stitched the raw edge closed on my sewing machine.

Here's the stenciled buttons and charms after baking.

I used a rotary cutter to slice the felted wool in half for the cuff.

I used a blanket stitch on my sewing machine to edge the felted cuff bracelet.

I tested various combinations of button and charm shapes and colors on top of the wool, and settled on alternating circle and rectangle buttons of both brown and cobalt. For the cuff, buttons seemed more secure than the one-holed charms.

The rectangular buttons were a happy accident...I intended to cut only circular shapes, but had leftover film that was cut into rectangles.

I pinned the buttons onto the felt to position them for sewing.

For the closure, I debated the possibilities: velcro? a jewelry closure? a snap? A tied closure with fibers? A loop and button? Elastic? I settled on a giant vintage hook and eye, which would be durable and easy to use.

I rummaged through my new and vintage closures to find just the right one for my cuff.
The finished bracelet fits loosely at the wrist, but tightly enough not to slide off.

After doing a little research, I discovered how I missed Shrinky Dinks in my childhood...it hadn't been invented yet...when it debuted in 1973 I was a high school senior! It took me 41 years to discover  Shrinky Dinks...I just might have a new addiction!


Wednesday, April 7, 2021

Up-Cycled Paintbrush Doll


What do you do with those old paintbrushes in the bottom of your utility closet? Or stuck in a corner in the garage? Throw them out? No, make dolls, of course!

Years ago I would have tossed the old brushes in the trash, deeming them worthless with their paint stains and twisted bristles. Now I collect them!

For my first paint brush doll, I ordered a really nice kit from Retro Cafe Arts. But for many that followed, I changed the size of the arms, and base, and face and even the paintbrush to "make it my own."

For this doll, I started with some black cardstock paper, and using a stencil from StencilGirl, applied white and pale green acrylic with a cosmetic sponge. 

Next, I cut parts for the arms, body and crown. I used a big moon face from ArtTeaLife's Etsy shop, onecrabapple. 

For stability, I glued the face and body parts to recycled cardboard from a cereal box. I put the parts together using brads, which make it poseable and add visual interest.

Last but not least, I added part of a favorite quote from Maggie Kuhn, founder of the Gray Panthers, who advocated for the rights of elderly people. I was a shy child, and can still remember the terror of having to stand in front of the class to read or present a project. It took years, and a college class in public speaking, to be comfortable in front of a crowd, and sometimes I can still hear my voice shake, but I keep talking anyway.


Friday, April 2, 2021

Wildflower Woods

In the foothills of the Adirondacks, behind our childhood house, were some old railroad tracks. Beyond that was the remains of a Chenango Canal lock, part of the old upstate New York Erie Canal system. By the mid 1960s, it was all decaying and decrepit, but those few miles had morphed into an overgrown magical wooded land, with wildflowers, berry bushes, and a stagnant pond. 

When I saw Gwen's new PaperArtsy botanical floral stamps (EGL13) they reminded me so much of the woods and swampland behind my childhood home, I knew I had to have them.

I set out to try and recreate the feeling of being a child on a hot summer's day, walking carefully through the overgrown woods, searching for ripe berries and blooming wildflowers. I decided to work in my new Dylusions square journal, and started stamping on a page that I had already primed with gesso.

To echo the earthy feel I wanted to create, I used sepia ink.


I added colors for the sky and greenery with some Portfolio Water Soluble Oil Pastels. Next, I added acrylic paint here and there to create the mood of an overgrown mini forest.

The paint obscured some of the stamping, so I decided to stamp on tissue paper, then tore out the images I needed add it on top with matte medium.


It was beginning to look like the woods, but wasn't exactly what I envisioned, so I kept painting.

The page got a little too dark, so I added white. Then it got too murky so I added greens. I kept adding paint until I got a feeling of a verdant woodland.  To create more depth, I stamped a few of the images on the bottom with black archival ink. I kept adding more paint to create shadows and mystery, and also added some red for berries. (There were wild strawberries in the spring and wild red and black raspberries in the late summer--enough to make a delicious pie!)

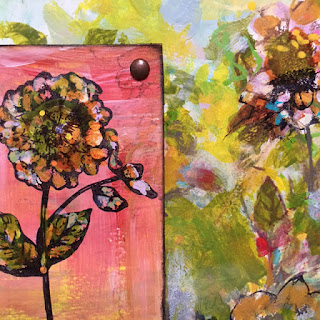
It was beginning to look like the woods on a summer's day, but I needed a focal point. Fortunately, I had painted some cardstock with the leftover paint. I decided to stamp the painted paper with black ink and see how it looked. And am I glad I did! 


I ended up with a bunch of little botanical paintings that I am saving to use on greeting cards in the future. I added color to the petals and leaves with a tiny brush, and extra black line details with a fine marker.

I chose a big flower with a reddish background and decided to incorporate it into the woodsy painting as a focal point. I liked the contrast of the red with the greens, and decided to attach it with some chunky brass-colored brads. 

While it isn't exactly like my old woods, it does recreate the brilliant sunshine, the thick greenery, and the wildness of that little woods. Sadly, it is only a memory now...developers plowed the land, filled in the remains of the canal, and built houses on the land. I think that, even now, some of the old magic is still in the air and the earth below the homes.