Showing posts with label Artistcellar. Show all posts

Thursday, March 22, 2018

Well, Hello Dollies!


Dolls are dear to the hearts of  many people. As much as I love three-dimensional dolls, I have always loved paper dolls even more. I have fond memories of receiving new paper dolls on special occasions, and of seeing the Betsy McCall paper dolls in the McCalls magazines at my grandmother's house. So, it's no surprise that as an adult, I am especially enchanted with making arty paper dolls. One of my friends recently started an online art paper doll trading group, so I got to work right away.

The first theme is "artists choice," so I started rummaging through my scrap papers looking at them with a new eye to see how each scrap would translate into an arm, leg or torso. I also spent some time rifling through fashion magazines for interesting heads, printing and painting my own heads with stencils, stamps, and watercolors. My dolls usually cry out for wings and crowns, funky shoes and skirts too.
My work table with assorted doll parts and heads to choose from.
Left: Paper Doll body from Retro Cafe Arts; Right: head stamp from Lynne Perrella plus assorted body pieces.
For most of the body parts, I used a template from Retro Cafe Arts. Reprints of vintage paper doll parts are also fun to use, and available on the internet from many sources, such as The Graphics Fairy.
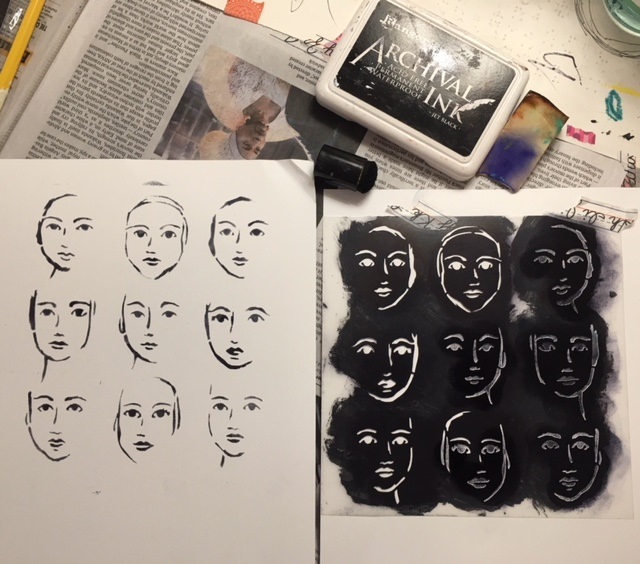
A face stencil from StencilGirl was used for some of the doll heads.
A stencil from Stencil Girl had nine heads that were just the right size for my template. I dabbed black ink through the stencil, and also flipped the stencil and made nine more.
Color was added with Derwent Inktense Blocks.
I added hair, ears, and more color to the stenciled faces.
  I added my own lines for the hair and ears. With Derwent Inktense Blocks and water-soluble colored pencils, I added details. After they dried, I carefully cut out the ones I liked best.

Some of the faces were very close together on the stencil, leaving little room for hair so those faces needed hats and crowns.
 For wings, I used a large butterfly stamp that was purchased at Ink Pad NYC. A magical effect was achieved using the stamp with Seth Apter's Baked Texture embossing powder. I used a variety of embossing powder and background colors for the wings. For more subtle dolls, I used a mini wing set and small crown stamp designed by Birgit Koopsen. German Dresden Trim Gold Bourbon Crowns from Gwen Lafluer's website topped several heads--some distressed, some left shiny.

This was a test page leftover from creating grunge-effect backgrounds painted on a recycled manila file folder. I used the left side to make butterfly wings and the right side for body parts.
Once I got started, my worktable looked like a doll factory. I had an assortment of body parts scattered around, and kept mixing and matching them. I like to use mini brads to assemble the dolls; the brads allow the dolls to be posed, and also makes it easy to tuck the arms and legs up and down so they fold up very small for storage. Unlike three-dimensional dolls, 20, 30 or more paper dolls can easily be arranged to fit inside a shoebox for storage.
A folding tray table was used to try out different combinations of body parts
before mini brads were added to hold the dolls together and make them poseable.
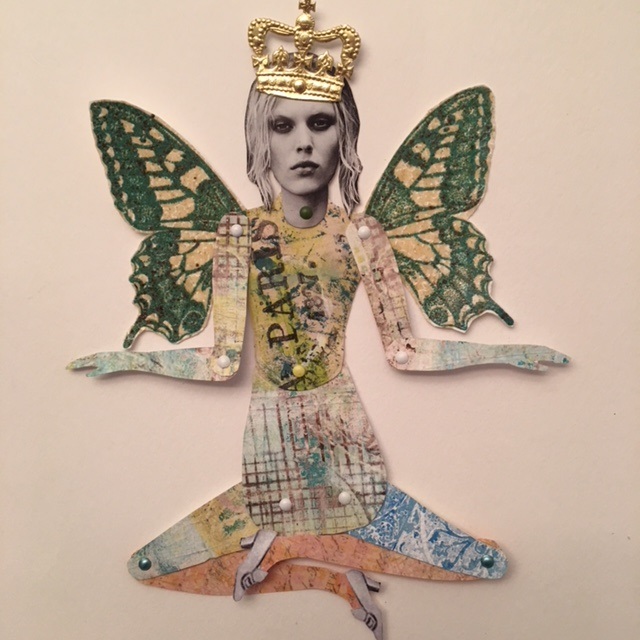
This green-toned doll has a supermodel's magazine photo face, mail art scrap body parts, embossed wings
and a Dresden Trim Bourbon Crown.
 On another, I used a Dresden Trim gold medallion and distressed it to look like an ancient warrior's helmet. To enhance the warrior/goddess effect, I added little gold wings on her feet. Later, I gave her a gossamer ice blue skirt, made from a sheer fabric gift bag with the bottom cut off.
This doll has the feel of a female warrior, with her elaborate Dresden Trim crown, embossed wings and winged boots.
Washi tape and a downloadable rose from Gwen's collection were added to enhance some of the body parts. The large and small wings have added bling with embossing powder from Emerald Creek.
Two different floral washi tapes were added in a cross design to enhance a body made from commercial scrapbook paper.
This doll has a small downloadable rose and several washi tapes on a collaged body.
Four of my favorite dolls--I couldn't quite part with any of them.
It was hard to decide which to keep and which to trade. Once I made a doll that I loved, I didn't want to part with it. Finally I created one that was perfect for my trade partner: a hipster fashionista steampunk-inspired doll. She has a magazine face, big embossed wings, distressed rust body parts made with Seth Apter's chalk paints, and most magical of all--a skirt made from an embellished Silk Sari scrap--one of the new items on Gwen Lafluer's website.
The word "seek" was made from an Artistcellar pocket stencil used with chalk paints and Baked Texture Patina Oxide, and the clock parts were gifted to me in an art trade.
On a background of chalk paint layered to imitate a rusty surface, I stenciled and embossed the word SEEK,
and also flipped the pocket stencil to get the opposite image.
This detail shot shows the embellished sari scrap skirt and clock parts.
It was hard to part with this very special doll, but I received something wonderful in exchange.
In the first trade, in exchange for my "seek" doll, I received a fabulous creation from artist Ann Sullivan Barnes. She used components from Character Construction to make this fabulous doll, which she named Liberty. Liberty also came with a beautiful red, white and blue carrying case.
"Liberty" by Ann Sullivan Barnes
"Liberty" detail shot
These type of paper dolls can also be a great shared project with children, and, depending on how they are decorated, make great additions to seasonal displays. Imagine Halloween paper dolls in scary witch costumes riding a broom or lucky leprechauns with a pot of gold!

Here are some of my favorite creative dolls I have received in trades over the years. I hope they inspire you to give paper doll making a try.
Teapot/geisha doll by Leah (last name unknown)
Mythical, magical midnight ball "Bartholomew Badger," by Joann Robinson
Turn of the century Zetti bather "Liam," by Joann Robinson
Turn of the century Zetti bather by Jeanne Draachreider
Tea party/geisha "Mi'" by Joann Robinson
Marie Antoinette theme: Madame DuBouffant, by Deb Benedict
Steampunk Doll by Kay Milam
Mizz Prissy BuZahrd by Jeanne Draachreider
Mermaids and Mermen theme; Stan the Toucan Man by Marilou Bain

Congratulations to Gwen Lafluer! Her online shop has just turned one year old. To celebrate, she is offering a really great discount--15% off Mixed Media supplies and downloads. She has a really unique and inspiring collection...I really want everything on her site! Happy shopping!


Friday, December 1, 2017

Creating Women Who Run With the Wolves

Faces are fascinating. They can convey softness, strength, vulnerability, power, anger, sadness and a multitude of other emotions. But faces are tricky to draw or paint from scratch. A great help is using a stencil to get the basic proportions right. Once the eyes, nose and lips are positioned, you can let your imagination run wild.

For two recent journal pages, that is exactly what I did. Once the facial features were in place, they developed into strong, fierce looking women, who reminded me of archetype women inspired by the book Women Who Run With the Wolves, by Clarissa Pinkola Estés, PhD.
What started as a stenciled face morphed into an archetype woman
after adding some handwritten thoughts and Gwen Lafleur designs.
I started this face with an old Jane Davenport stencil. On my lunch break, I lightly traced the stencil lines into my handmade journal and added watercolor randomly. I was going for unnatural colors and sort of an alien mood. I could have stopped at the watercolor stage, but my brain cried, "More, more, more!"
Over the weekend, I had  more time to work on the journal page, so I used three of Gwen's stencils to add interest and texture. Using a small wedge cosmetic sponge, I applied white acrylic paint through the stencils, giving a suggestion of a neck tattoo with the decorative folk flower stencil, a dangly earring with a section of the art deco border stencil, and a crown with the decorative medallion stencil.
I then added a little more color and accent with colored pencils, white paint, chalk and gold paint.
The last steps were adding some sparkle to the eyes, and words about inner strength that came into my mind as I looked at the almost-finished page.

I recently got a new Khadi journal, which is made with wonderful, handmade Indian watercolor paper. I have been testing various art mediums in it...it is terrific for watercolors, watercolor crayons, and watercolor pencils, but if used for stencils, you need a layer of paint or gesso first to prevent unwanted bleeding, which I found out the hard, messy way!

So, I put down a layer of white gesso on the journal page and let it dry. Then, through another old favorite Jane Davenport stencil, I penciled in the lines of the face and added in my own lines for the hair and upper body.
.
Next, I used some parchment paper as a mask before I started working on the background. I wanted to showcase some of Gwen's stencils in the background, so I mixed up some purple acrylic and sponged it through the decorative folk flower stencil. It was a little too dark, so I used some white paint on bubble wrap to soften it.
Next, I went to work on the face. The color I mixed was not perfect, but I knew I would paint over it.
I painted in some lines for the hair and clothing, and when dry, added color with watercolor crayons.

The page looked like a hot mess with no hope, so I put it away for a few days.

The next weekend, I used some more acrylic paint and colored pencil to get the face to look less gray. I added eye color with a TomBow brush tipped marker, and some turquoise watercolor to add depth to the purple stenciled background. It started to look like less of a hot mess.

The eyes needed work. I softened the eyebrows and added some blue accent under the eyebrows. I also added green watercolor to the clothing.
She looked almost done, but something was missing. Using a sepia ink pad, a small cosmetic sponge and a mini dabber tool, I added Artistcellar mini chakra pocket stencils at her throat, third eye, near her heart and in the background. With a sharpie marker, I added inspirational words.
Once the words and symbols were added, what had been just another pretty face transformed into a second archetype woman.

Both women on these journal pages are beautiful, feminine, and graceful, yet the added words and symbols convey inner strength, knowledge, and wisdom. Side by side, they make a powerful team.

_______________________________________________

To see the two types of Artistcellar mini chakra stencils I used, click here.
Jane Davenport stencils are available here

In December, Gwen's Artist Tribe is focusing on creative ways to use Dresden Trim and English/German Scrap. Look for posts from me, along with Jackie P. Neal, Lynda Shoup, Jill McDowell, Sandee Setliff and of course, Gwen Lafleur (links are on Gwen's blog) ...annnnnd you can save 15% when you order any Dresden or Scrap during December. Details are on the coupon below.





Sunday, July 2, 2017

Turning Over a New Leaf

Doodles, doodles, doodles. I am constantly doodling flowers, leaves, geometric shapes, alphabet letters, names, and faces. I often collect my doodles and turn them into a design, or just tape them on a journal page for later reference.

After I doodled a leaf on a little blue sticky note the other day I realized the symbolism--I am actually in the process of turning over a new leaf--a new job, new duties, with a new location, new co-workers, a new commute--so what could be more appropriate than a journal page about turning over a new leaf?

Then, yesterday morning, I got a package in the mail with some art trades in it, and the trade hostess had included some little cutout pieces of...guess what?...leaves of course. So, I painted them green, and also used them as a stencil while I was painting them.

I was in love with my old journal. It was square, which is perfect for Instagram. Perfect for a Virgo who likes everything neat and square and tidy. But the new journal is a horizontal rectangle, which has me less in love with it than my old journal. Previous to the square journal, I used, or made, journals that were rectangular, but vertical.

So, I decided to create a square space on each page of my new journal, and either leave the extra space blank, or do something unrelated in that space. Sometimes I incorporate it into my design, sometimes not. On the page below, I put the blue sticky-note on the top right, and underneath, some of the little stencils of the cutout leaf shapes I received in the mail. The main design is on the left. I started with a page painted in a bright yellow--one of my favorite colors.

"Turning Over a New Leaf" journal page
 I used acrylic paints, paint pens, and Jane Davenport paint-over pens. Once it was dry, I added white printmaking paint with a Nathalie Kalbach Versailles art-foamie stamp around the edges.

When I was done, I realized it was strikingly similar to a design I made several years ago and turned into fabric. Here is the link to the fabric I designed a couple of years ago, and the blogpost about it. Not only do I keep doodling the same thing, I also seem to choose the same color combinations. I guess they are my happy shapes and colors.

Below is an art journal page that I did a few days before the "turning over a new leaf" page. Again, I used the happy yellow acrylic in the background, then added whimsical vintage paper doll parts, a model's face from a fashion magazine, and some of my own fabric scraps. I finished it with some handwritten words, a Retro Cafe Art solar flare stencil and Artistcellar inspirational word stencils.

"Riding the Waves" journal page
I realized recently something I have always known, but had forgotten: that I love not only making art, paintings, and designing fabrics, but I love turning them in to a useful, beautiful end product. Below I took some paper I had designed in Photoshop and output with a color laser printer on 8.5" x 11" paper, and, using an old envelope as a template, cut, folded and glued my own envelope. I added paper scraps and assorted washi tape. I used the fancy envelope to send out my folding ATC doll to the winner of the Paper Traders June "winner take all" ATC lottery. Here's the link to last week's post in case you were wondering what is inside the envelope.

"Mail Art" handmade envelope


Saturday, June 17, 2017

Finding My Inner Warrior


Inner Warrior Priestess
The last two weeks have been awful. No one died. I am healthy. And I have many blessings. I spent a lot of time counting those blessings while my heart broke and my eyes overflowed with tears, while I tossed and turned and my mind re-lived the trauma of the corporate axe. In the big scheme of things I was fortunate. Very fortunate and blessed. I used my art to work through my many emotions, my angry times, my sleepless nights.

The backstory is that the company I worked for terminated nearly 400 executives two weeks ago. Maybe I saw it coming...but I didn't want to see the handwriting on the wall. I felt like a woman whose boyfriend was cheating on her with a brainless floozie. My boss could barely make eye contact with me. Our meetings were rushed. He acted weird. I thought, naively, "Oh, it's the stress of the coming layoffs, it's not personal, it's what he has to do on Friday." But then the phone rang about noon. I nearly collapsed on the walk from my office to the other side of the hospital to the firing room. I did my breathing exercises, blowing out for more counts than I was breathing in so I didn't hyperventilate or have a panic attack. He talked, I breathed out like a woman in labor as the rhetoric swirled around. "It has nothing to do with your job performance...we are eliminating executive staff with no direct patient contact...yadda, yadda, yadda."

I went back to my office and packed up. My work friends gathered around for support. Gave me hugs. Helped me pack. I didn't cry. They did. I finally cried two days later. I got angry. I painted. I cried. I painted. I cried some more. I updated and honed my resume. I bumped up my LinkedIn profile. I applied for jobs. I went to post-employment seminars and a jobs fair. Thankfully I was offered a new position at another location, this time with direct patient contact. I took a big, big hit on the salary. I am reinventing myself in the business world, tightening up the family budget, and hanging on to my pension fund and healthcare. So I am blessed. I am looking ahead, not behind. I am trying to let go of anger and hurt and resentment. I am channeling my anger into emotional and spiritual power. And I am painting.

The Inner Warrior Priestess journal page started with a Jane Davenport face stencil. I outlined it lightly in pencil, then added my own lines for the body, hair and background. I used Portfolio water soluble oil pastels for the face and background colors, blended them with a wet paintbrush, then added watercolor pencils, TomBow brush tipped markers and other accents. When it was dry, I placed Artistcellar mini chakra pocket stencils on the appropriate place for the third eye, throat and heart chakras and used black Archival ink with a mini dabber to create the stenciled shape.

I revisited my Jane Davenport beautiful faces CD to get the eyes and cheek color the way I envisioned it in my mind. The words came to me at the very end, and I added them with a black sharpie marker.

Prior to creating the Warrior Priestess page, I worked through my various emotions with an assortment of techniques.

Page from my mini journal. Words were added while in the waiting area of Post Employment.
This is a mini journal page. The words and shapes were doodled while in the waiting room of the Post Employment office.
The words on this mini-journal page were added during a long, long wait in the Post Employment office.
The words "I am resilient, I am the phoenix" kept playing in my head to the tune of the Beatle's "I am The Walrus" so I painted it. The marker was not water-resistant so it ran, but the runny words echoed my teary eyes.
My friend (who was terminated in the first round of layoffs) was amazed at how resilient I was, so I painted the words "I am resilient" as a mantra. I didn't like the sloppy look when the markers ran and the words blurred, but it did echo my emotional state.
This scribbly floral journal page has many layers of paint, markers and gesso and was a way to channel my anger and emotions.
After I was offered a new job, I was so relieved and thankful, and I came home and painted the "Joy" journal page.
The day after I accepted my new job offer, I created a romantic, sepia-toned journal collage expressing my gratefulness for all that I DO have. The little angel photo was a gift from an artist friend, and seemed especially appropriate. I stamped the word "trust" with sepia ink and added "the universe" with a sepia pen.