
My Sari Scrap Deco Queen Doll came about quite by accident. It was one of those projects where an item on my worktable sparked an idea, and another nearby object built on that first spark. The ideas kept snowballing as I puttered and played. Some would say my Muse completely took over.

She (I'm calling her Agnes) started with a cardboard tube from a roll of toilet paper. I had made a 3-dimensional paper doll a few weeks ago using a roll as a base so I had an extra one hanging out on my desk. I happened to be pawing through my bag of sari scraps (from Gwen Lafluer's online shop,) and a beautifully embroidered purple scrap landed on the table. It looked like it had been cut from the neckline of a dress, and the shape looked like it just might make a good circle skirt on the tube.

I tried it on and it was juuuust right. So, I used a little gloss heavy gel and glued it in place, securing it in back with a clip and small piece of parchment paper until it dried.
Yet another bag of scraps was on my computer table. It contained a bunch of test pieces that I made but hadn't used for my project with the September 2022 StencilClub mashup set created by Gwen Lafluer and Marybeth Shaw. Below is the StencilClub set that I used, as well as the project I made a few months ago with the BohoVibes stencils.


I thought I might use some of the leftovers for doll parts, especially arms and legs. I saw the art deco floral medallion and thought it kind of looked like an Elizabethan collar, so I popped it in the tube.

Then I realized that if I added a face, it could look kind of cool. I rummaged through my bag of faces and found a few, auditioning them until I found the one that worked best. I used one from J Lee Loo's Etsy shop. I also found some gold and black scraps, cut arm pieces, and attached them with mini star brads.

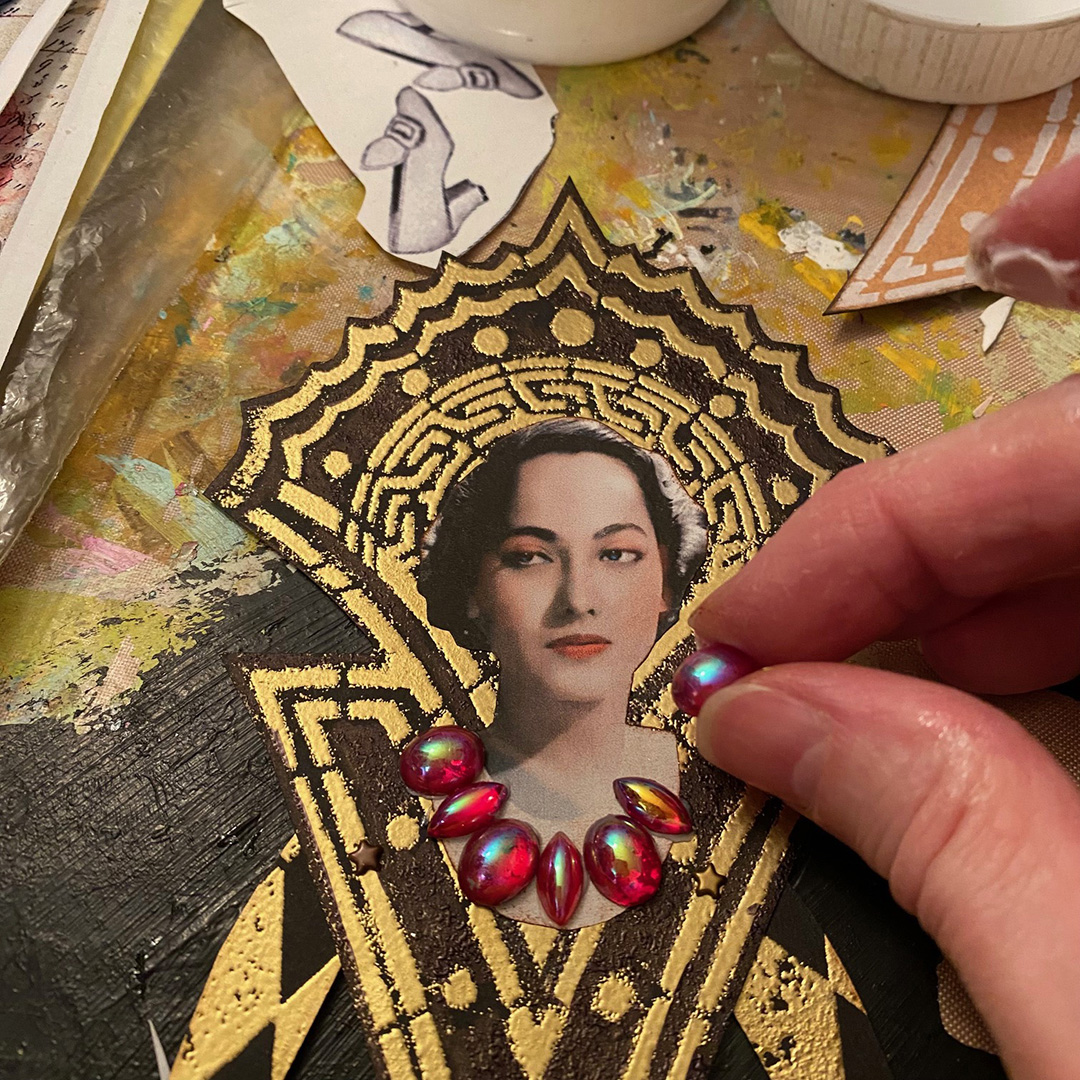
I carefully cut the face out, aged the edges with a fingertip dauber and sepia ink, and glued it in place. So far, so good!
But Agnes' neck looked naked. I rummaged in my jewelry-making caddies for some bling. Purple might have been perfect, but I didn't have anything purple that worked, so I settled on some red vintage flat bottom gems that were a gift from my Lafluer ArtistTribe sister Jackie PN. There were small red accent beads on the purple and gold skirt, so the red beads coordinated nicely. Later I added gold acrylic between the beads on the bottom of the neckline.
Agnes was coming together nicely. It was time to work on the skirt. There was a little gap in the very front, so I painted it gold to match the embroidered flower on the center top. That wasn't quite enough, so I pulled out my stash of beads, found some gold ones, and stitched them on using a beautiful gold thread from Gwen's website.


I wanted the skirt to have some fullness and shape rather than just draping over the cardboard tube. So, I wound some inexpensive yarn around it to create a bell shape (thicker on the bottom) that the skirt could drape over. I loosely stitched the yarn to the bottom of the tube so it wouldn't fall off.


I debated whether or not to attach the top to the base, and decided to keep them separate. Instead of attaching the pieces, I added a bar that the "waistline" could rest against. Again I sifted through my jewelry-making components for a suitable solution. I decided to use a long headpin. With an awl, I poked a small hole, added a decorative gold bead to the headpin, threaded it through the tube, poked another hole, added a gold bead, and, using small pliers, twisted the pin into a tiny loop to secure the bead.


I was nearly done! All that remained was to gently press the wrinkles out of the skirt, and hand-stitch the hem.
Here's a few detail shots of Agnes, the finished Deco Queen. I hope she inspires you to save your scraps, "shop your stash" and see what can be created from little bits and pieces in your studio.

No comments:
Post a Comment