 |
| Shabby-chic faux-lace tea and roses Khadi journal cover |
When I saw the Khadi art journal on Gwen Lafleur's website, it called my name. Not only is the shape, size and weight perfect, but the paper is high quality, handmade watercolor paper.
| unadorned Khadi journal |
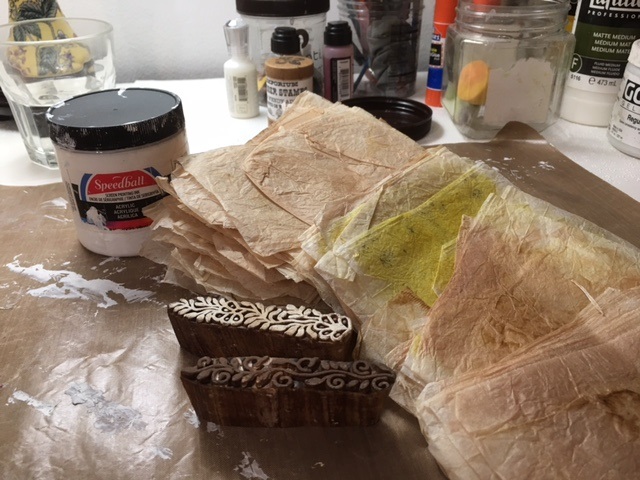 |
| Mini border wood blocks, teabags and printmaking paint |
 |
| Two mini border woodblock stamps, with white printmaking paint applied to one stamp. |
 |
| Above, the teabag has been gently pulled off the stamp, revealing the print on the right. |
Below is the group of printed teabags that I used for this project. I tried my mini border stamps in all over patterns, stripes, alone, as a border around a teabag, in a fan shape, and in the center of some of the smaller teabags. (If you would like to read more about printing teabags to create "faux
lace", there is a tutorial on my blog and the link is here.)

First I spread a thin layer of Liquitex matte medium all over the cover with a credit card. (I keep a container or baby wipes handy to wipe the excess off my credit card as well as my fingers. I also like to use a non-stick surface under my project.)

I added each printed bag one at a time, smoothing it out with the credit card and occasionally with my fingers, and overlapping them a little, then adding some extra matte medium on top, which I smoothed out with a credit card. I used my heat gun to speed up the drying process.
 |
| The first teabag has been placed on the journal cover, with a dollop of matte medium waiting to be spread on top. |
 |
| This is the journal cover about half way through the process of gluing on the teabags. |
 |
| The last, and center, printed teabag has been placed, and a squirt of matte medium will be spread on top. |

I decided that the background was too stark white, and needed to be aged to go with the vintage look of the teabags. So, here's what I did: first, I gently tore the edges of the paper, because a torn edge is softer than a cut edge, and I was going for a soft, feminine, vintage look. Then I rubbed on some antique linen Distress Stain, intentionally making the white areas blotchy and uneven, and bringing the stain up into some of the flower petals. Last, I took a mini dabber and applied some sepia distress ink and archival ink to the edges and here and there on the white paper.


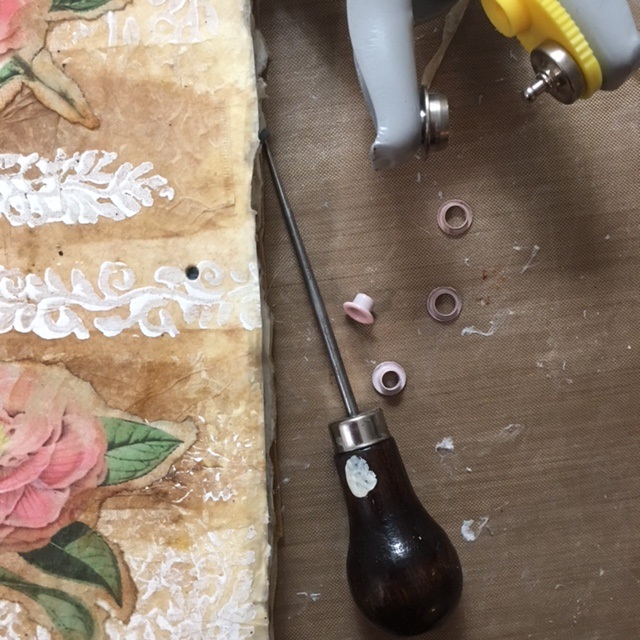
I was almost done, but I needed a closure of some kind. After some thought, I decided to use grommets and ribbon. With an awl, I poked a hole near the center right edge of the cover, then snipped it a little more to be just about the size of the grommet. I inserted the little pink grommet in the hole, pushed the smaller part onto the back, arranged my grommet tool over the pieces, and squeezed to secure it.

For the back of the journal, I used plain teabags. I put a pink grommet midway down the left side of the back of the journal. After "auditioning" several kinds of ribbon and fiber, I settled on some pink and green dotted ribbon that had been in my "stash" for years. It was just the right shade of pink, and the green was a pretty good match with the rose leaves.
Here is the finished journal, open:

...and here is the finished journal closed and tied. When I look at the journal, it evokes a nostalgic feeling, and reminds me of my grandmother and the flowers growing around her old country farmhouse, and brings back happy childhood memories.

8 comments:
Wow Linda, I have a stack of about 50 dried tea bags in my stash but never could figure out how to use them. You've just set my mind on fire! The Kandi Journal itself is beautiful thing and you just made it more incredible. I'm definitely putting some of your techniques to work!
I just loved how you aged the flowers to coordinate with the teabags, you definitely mastered the vintage look! So nice to find khadi lover too...now I need to start saving my tea bags!
This is so beautiful! I love the idea of the faux lace - it looks great! The finished effect is lovely... soft and feminine with a great shabby chic vibe :D
Absolutely breathtakingly gorgeous Linda! truly it remind s me of an old vintage memory journal! Such a lovely and clever idea to use those teabags, they go perfect with your aged roses and block stamping.
Well done my friend!
hugs,Jackie xx
This is a beautiful project. You have used your materials in such an unexpected way. The results are lovely. Faux lace! What a fabulous idea! I have always loved this shabby chic look, but have really had a hard time achieving it. I may have to come back and read this until I can start achieving that look.
Thanks for including tips on choosing tea bags for their color. I have many varieties of tea and it will be fun to check out the different hues.
Loved the whole post.
I love the shabby chic look of this. I have many teabags saved and some pasted in my journal. I have to try this beautiful paper. Now I have some great ideas
This is so soft and pretty! I think I need to start saving tea bags!
Thank you for sharing your techniques...your piece has an ethereal, romantic feel
Post a Comment